How to Fix Windows Error 0 ERROR_SUCCESS The Operation Completed Successfully
This error may be caused due to any glitches while updating your PC, downloading any applications from Windows Store, when you boot or shut down your computer, and when doing any tasks like printing documents, etc. You can ignore this error, yet the continuous prompt of the problem annoys you most of the time.
How to Fix Windows Error 0 ERROR_SUCCESS The Operation Completed Successfully Method 1: Perform Clean Boot Method 2: Remove Background Processes Method 3: Clear Temporary Files Method 4: Delete AppData and Local AppData Method 5: Change Account Type Method 6: Disable VPN Client Method 7: Disable Proxy Method 8: Modify LAN Settings Method 9: Repair System Files Method 10: Run Malware Scan Method 11: Update Drivers Method 12: Update Windows Method 13: Reinstall Problematic Application
You may face the following similar errors.
Error Code 0x00000000: The operation was completed successfully Error Success: The operation was completed successfully Error success 0 (0x0) The operation completed successfully win32exception
Some of the reasons for this issue are listed below.
Corrupt system files Conflicting drivers Outdated Windows version Malware or virus attack Unexpected shutdown Windows administrator ownership issue Damaged software while downloading Incomplete Windows update
In this section, we have compiled a list of methods to troubleshoot this issue. Follow them in the same order to attain perfect results.
Method 1: Perform Clean Boot
The issues concerning operation completed successfully issue can be fixed by a clean boot of all essential services and files in your Windows 10 system, as explained in this method. Note: Make sure you log in as an administrator to perform Windows clean boot.
To launch the Run dialog box, press the Windows + R keys together.
Type msconfig and click the OK button to launch System Configuration.
The System Configuration window appears. Next, switch to the Services tab.
Check the box next to Hide all Microsoft services, and click on the Disable all button as shown highlighted.
Now, switch to the Startup tab and click the link to Open Task Manager as depicted below.
In the Startup tab, select the startup tasks which are not required and click Disable displayed in the bottom right corner.
Close Task Manager and System Configuration windows.
Finally, restart your computer and check if this issue is fixed.
Navigate to the Start menu.
Now, select the power icon. Note: In Windows 10, the Power icon is found at the bottom. Whereas in Windows 8, the Power icon is located at the top.
Several options like Sleep, Shut down, and Restart will be displayed. Here, click on Restart.
Method 2: Remove Background Processes
In many applications or programs run in the background, then this will increase the CPU and memory space, thereby affecting the performance of the PC. This may have led to this Windows 0 ERROR_SUCCESS error. Follow the below-mentioned steps.
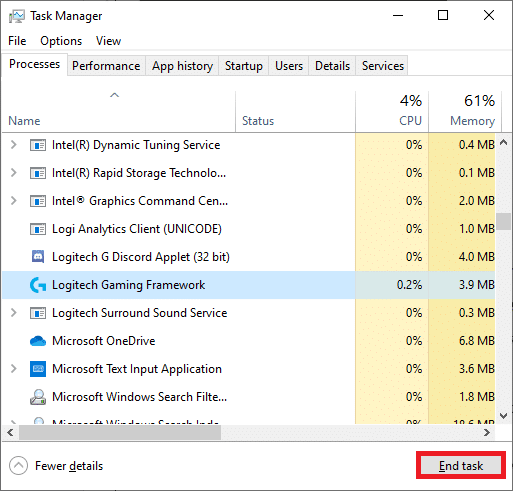
- Launch Task Manager, press the Ctrl + Shift + Esc keys at the same time.
- Locate and select the unwanted background processes using high Memory.
- Then, click End task, as shown highlighted.
Also Read: Fix Windows Update Error 0x800704c7
Method 3: Clear Temporary Files
When your system has any corrupt registry files, you will encounter Windows Error 0 ERROR_SUCCESS: The Operation completed successfully issue. You can fix this error simply by deleting the temporary files in your system. Then, follow the instructions to implement the same.
Press the Windows key, type %temp%, and click on Open.
Here, select all files and folders by pressing Ctrl + A keys together and then right-click on the selected files.
Select the Delete option to remove all the temporary files.
Finally, go to Desktop and right-click on Recycle Bin. Select Empty Recycle Bin option to permanently delete the data from your Windows PC.
Method 4: Delete AppData and Local AppData
If your system has any corrupt configuration and setting files, you might encounter Windows Error 0 ERROR_SUCCESS issue. However, you can delete the AppData folder to remove the corrupt configuration files. Here is how to do it.
Click on Start, type %appdata%, and hit the Enter key to open AppData Roaming folder.
Select the AppData Roaming folder and navigate to the folder (e.g. WhatsApp) of the program causing you’re the trouble.
Now, right-click on the folder and delete it.
Now, press the Windows key, type %localappdata%, and click on Open to go to AppData Local folder.
Find the faulty folder by using the search menu and delete it.
Now, you have successfully deleted corrupt configuration files of the application from your PC. Also Read: How to Fix Windows Update Error 80072ee2
Method 5: Change Account Type
Sometimes, you face this issue when your system has ownership issues with the Windows administrator. Follow the below steps to change the account type if you use a standard user account to fix Windows Error 0 ERROR_SUCCESS issue.
Hit the Windows + I keys simultaneously to open Settings.
Select Accounts setting.
Click Family & other users in the left pane.
Click on the standard account name and select Change account type.
Select Administrator and click OK, as shown below.
Method 6: Disable VPN Client
If you are using a VPN client, try disabling it entirely from the system and check if this issue is fixed or not. Follow the below-mentioned steps to disable the VPN client in your system.
Hit the Windows key, type VPN Settings in the Windows Search Bar, and click on Open.
In the Settings window, select the Connected VPN (e.g. vpn2).
Click on the Disconnect button.
Now, switch Off the toggle for the following VPN options under Advanced Options:
Allow VPN over metered networks Allow VPN while roaming
Also Read: How to Fix Access is Denied Windows 10
Method 7: Disable Proxy
If you face this issue while downloading an app from the Windows Store or updating it, you can try using another connection or disabling proxy. Then, follow the below steps.
Press the Windows + I keys simultaneously to open Settings.
Then, to open it, click on the Network & Internet setting.
Go to the Proxy tab on the left pane.
Here, toggle OFF the following settings.
Automatically detect settings Use setup script Use a proxy server
- Now, relaunch Windows Store and try to download or update the app.
- If not, use a VPN client and check if your problem is fixed. If not, try connecting your PC to another network like Wi-Fi or a mobile hotspot. Check if the issue is resolved.
Method 8: Modify LAN Settings
Several network connectivity issues may lead to this issue, and you can fix them by resetting local network settings, as discussed below.
Open Control Panel from Windows Search Menu.
Now, set the View by option to Category.
Select the Network and Internet settings.
Here, click on Internet Options as shown below.
Now, in the Internet Properties window, switch to the Connections tab.
Select LAN settings, as highlighted below.
Here, check the box Automatically detect settings and ensure Use a proxy server for your LAN box is unchecked. Note: You can enable the option again when you need it.
Finally, click on OK to save the changes and check if the issue is resolved. Also Read: Fix Computer Did Not Resync Because No Time Data was Available
Method 9: Repair System Files
System File Checker will help Windows 10 users scan and repair their system files automatically. In addition, it is a built-in tool that lets the user delete files and fix this Windows Error 0 ERROR_SUCCESS issue. Then, follow the below-mentioned steps.
Hit the Windows key, type Command Prompt and click on Run as administrator.
Click on Yes in the User Account Control prompt.
Type chkdsk C: /f /r /x command and hit Enter key.
If you are prompted with a message, Chkdsk cannot run…the volume is… in use process, then, type Y and hit the Enter key.
Again, type the command: sfc /scannow and press Enter key to run the System File Checker scan.
Note: A system scan will be initiated and it will take a couple of minutes to finish. Meanwhile, you can continue performing other activities but be mindful of not accidentally closing the window. After completing the scan, it will show either of these messages:
Windows Resource Protection did not find any integrity violations. Windows Resource Protection could not perform the requested operation. Windows Resource Protection found corrupt files and successfully repaired them. Windows Resource Protection found corrupt files but was unable to fix some of them.
- Once the scan is finished, restart your PC.
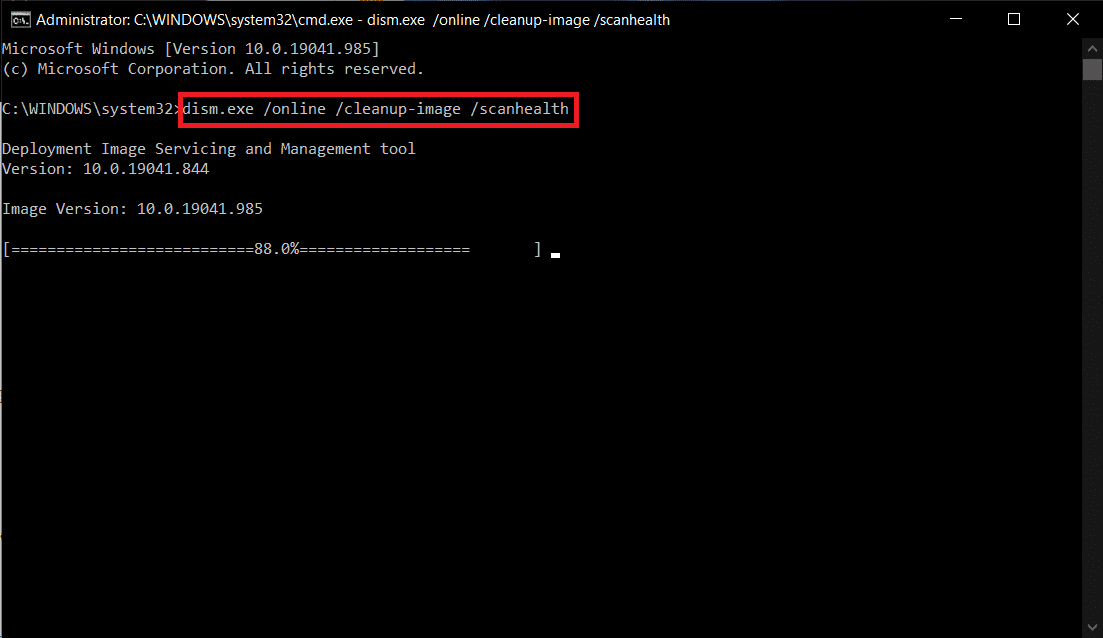
- Again, launch Command Prompt as administrator and execute the given commands one after the other: Note: You must have a working internet connection to execute DISM commands properly.
Method 10: Run Malware Scan
Sometimes, Windows defender fails to identify the malware or virus threat. There are a few anti-malware programs to get rid of this malicious software. This anti-malware software routinely scans and protects your system. To avoid or fix this issue, run an antivirus scan in your system. Then, follow the below-mentioned steps to fix Windows Error 0 ERROR_SUCCESS.
Hit Windows + I keys simultaneously to launch Settings.
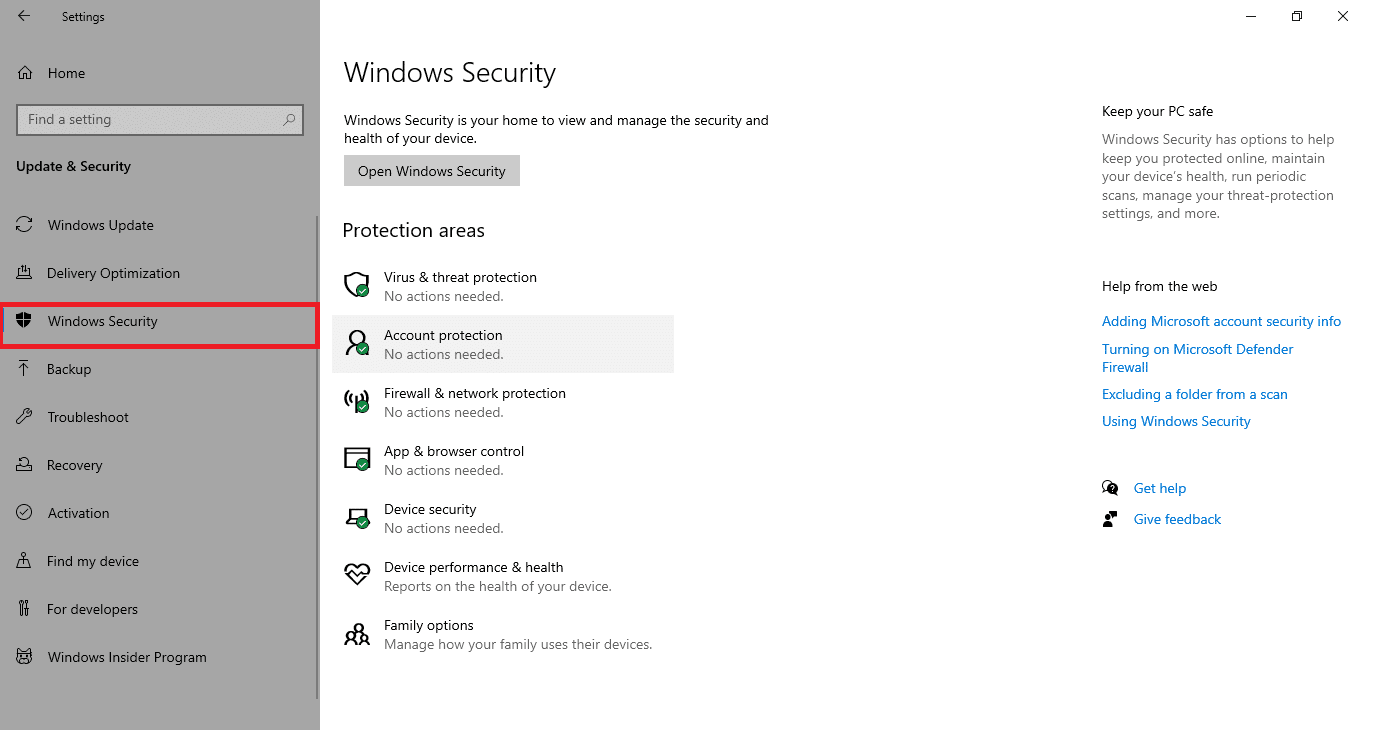
Here, click on Update & Security settings as shown.
Go to Windows Security in the left pane.
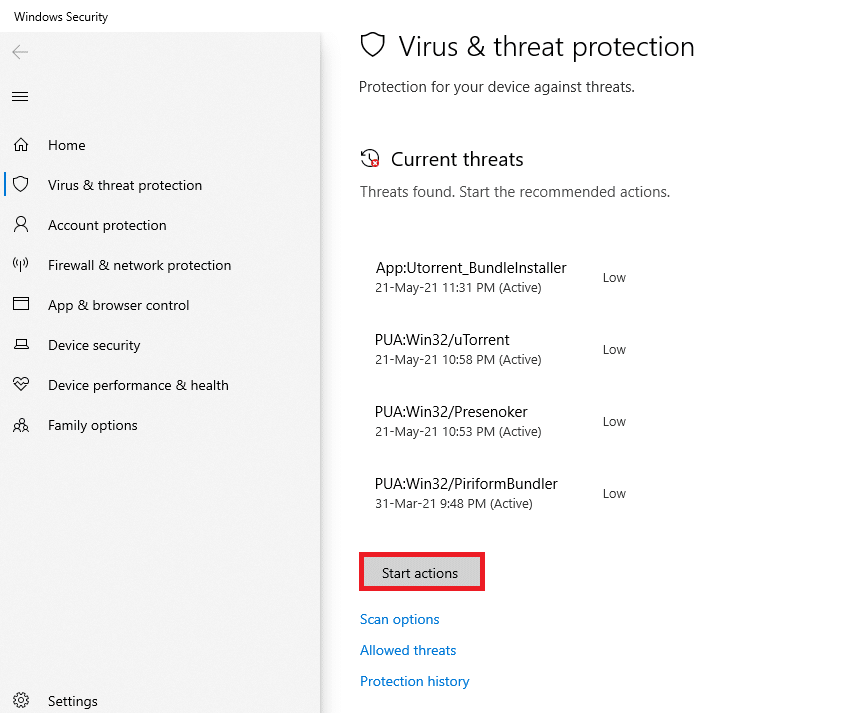
Click on the Virus & threat protection option in the right pane.
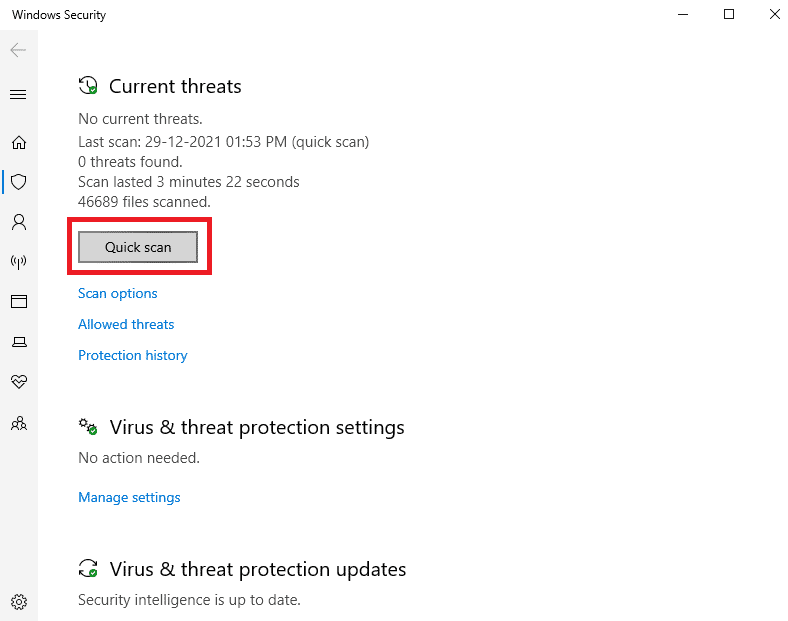
Click on the Quick Scan button to search for malware.
6A. Once the scan is done, all the threats will be displayed. Click on Start Actions under Current threats.
6B. If there is no threat in your device, the device will show the No current threats alert.
Also Read: 7 Ways to Fix iaStorA.sys BSOD Error on Windows 10
Method 11: Update Drivers
If the current drivers in your system are incompatible or outdated with the program files, then you will face Windows Error 0 ERROR_SUCCESS issue. So, it is always recommended to update your device and drivers to fix the said problem.
Type Device Manager in the Windows 10 search menu.
Double-click on Network adapters to expand it.
Right-click on your wireless network driver (e.g. Qualcomm Atheros QCA9377 Wireless Network Adapter) and select Update driver, as depicted below.
Next, click on Search automatically for drivers to automatically download and install the best available driver.
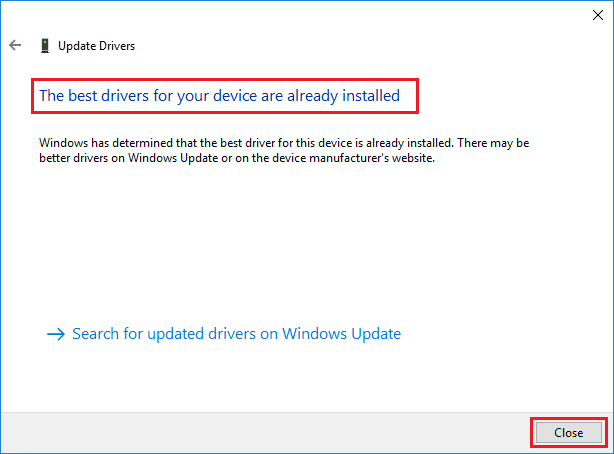
5A. Now, the drivers will update and install to the latest version, if they are not updated. 5B. If they are already in an updated stage, the message saying The best drivers for your device are already installed will be shown.
- Click on the Close button to exit the window and restart your PC.
Method 12: Update Windows
If you did not obtain any fix by the above methods, then there are few chances that you might have bugs or errors in your system. This can be resolved by updating Windows, as Microsoft releases updates periodically to fix the bugs in your system. The files in the system will not be compatible with the outdated version, leading to this ERROR_SUCCESS issue. Follow the below-mentioned steps.
Press Windows + I keys simultaneously to launch Settings.
Click on the Update & Security tile, as shown.
In the Windows Update tab, click on Check for updates button.
4A. If a new update is available, then click Install Now and follow the instructions to update.
4B. Otherwise, if the Windows is up-to-date, then it will show You’re up to date message.
Also Read: How to Delete Win Setup Files in Windows 10
Method 13: Reinstall Problematic Application
If none of the methods have helped you, try uninstalling the software and reinstalling it again. Reinstalling it will resolve any common glitches associated with a software program. Here are a few steps to fix ERROR_SUCCESS issue. Note: Here, Discord has been shown as an example.
Press the Windows + I keys simultaneously to open Settings and click on Apps.
Scroll down and select Discord.
Now, click on Uninstall.
Then, click Uninstall in the pop-up.
Press Windows + E keys together to open File Manager.
Navigate to path C:\Users\USERNAME\AppData\Local.
Right-click on Discord and select Delete.
Press Windows + E keys together to open File Manager.
Navigate to path C:\Users\USERNAME\AppData\Roaming.
Right-click on Discord and select Delete.
Click on the link attached here and click on the Download for Windows button as depicted.
Now, navigate to My downloads and launch the DiscordSetup file. Finally, you have reinstalled Discord on your computer. It would have fixed all the issues associated with the app. Recommended:
How to Download, Install, and Use WGET for Windows 10 Fix Event 1000 Application Error in Windows 10 Fix 0x80004002: No Such Interface Supported on Windows 10 Fix Oops Something Went Wrong on YouTube Error
We hope that this guide was helpful and you could fix Windows Error 0 ERROR_SUCCESS the operation completed successfully. Let us know which method worked for you the best. Also, if you have any queries/suggestions regarding this article, then feel free to drop them in the comments section.